Here is my DIY Dream Catcher!
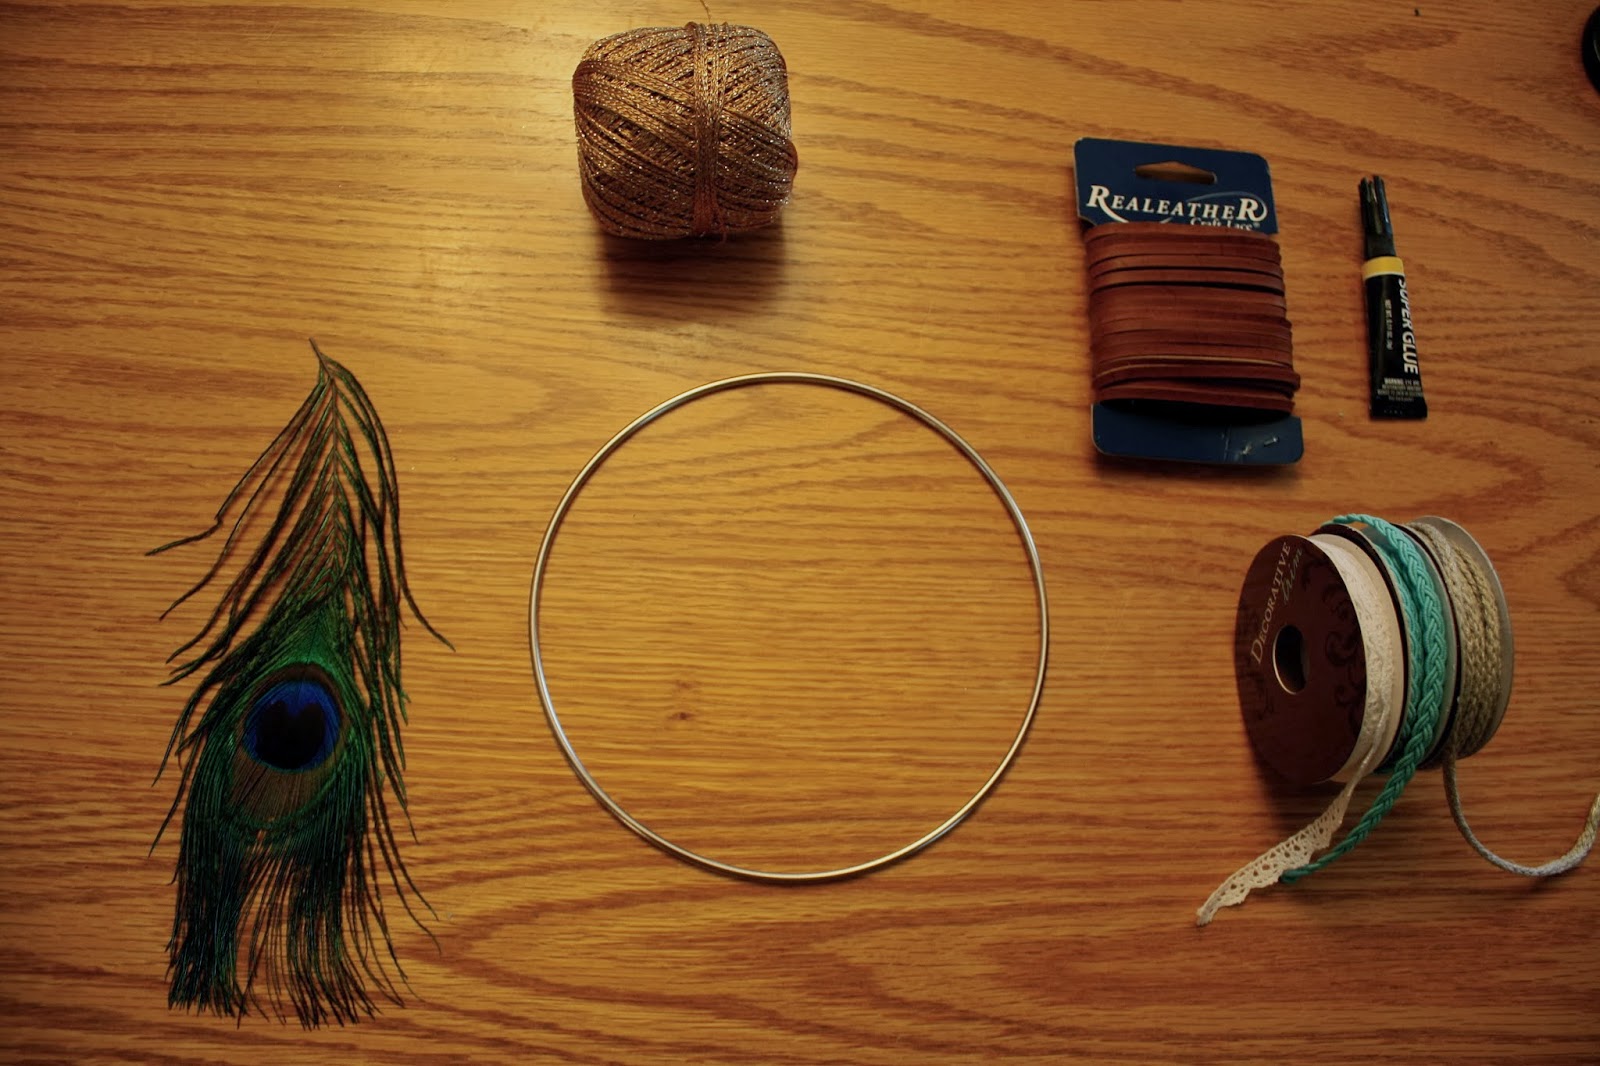
What You'll Need:
Metal Ring (In the "Native American" section of the craft store)
Leather
Thin Thread
Ribbons or Thread to Hang From the Bottom
Hot Glue (yes, super glue is pictured)
Feather (you can find one or buy one or not use one)
* If you want, you can add beads or really anything anywhere on it.
LET'S GET READY TO RUMBLEEEE! (*or to craft whatever)
Begin by cutting strips of the thread you are planning to use.
At first I tried to use super glue, but that didn't work out.
So, I switched to my trusty Hot Glue Gun.
Pretty cute I know.
Please exscuse how gross I look...
<333
Okay, so now that you have your hot glue gun, begin gluing your strips on with a little seperation. The small thread, I just tied on since it is so little.
I went to attach the feather, and I did not like how it looked being such a massive peacock feather, so I cut it down and tied it on to one of the small pieces of thread. I also added a dab of hot glue to make sure it stayed in place. You can do the same thing with any type of feather. Personally, I like the look better when it is hanging down rather than being directly attached to the ring, but it is all personal preference. Once all of the pieces you have chose to leave hanging down are in place, it is time to begin wrapping the ring with the leather. The leather I have pictured above is very stiff and difficult to work with. I suggest getting a Suede Leather that is much thinner and more flexible. It worked much better on a previous dream catcher I had made.

When you are ready to begin wrapping, put some hot glue on the ring at the top and apply the leather to that spot. hold until the hot glue hardens. Then begin wrapping the leather around the ring. The leather will get a little twisted, but untwisting it is not too much of a pain. Once you reach the part where you have connected ribbons, things get a little bit difficult. The thicker the ribbon, the harder it is to wrap around the ring and disguise the ribbon. It is possible to add the ribbons after you have wrapped the metal ring, but with thicker ribbon it is harder to get in between the slots; it really is a bit of a struggle either way. You must wrap in between the spaces you have left between the ribbons and try to cover as much of the metal and top of the ribbon as you can. There may be some slight bumps, but once you are finished it is not very noticeable. You continue wrapping all the way around until you reach the top. You add more hot glue here and secure the final part in space. I then like to tie a knot and make a loop at the top. I used some hot glue to help me make this loop. Now, it is time to begin decorating the center portion.

You start by tying some of the thin thread in between a wrapping of the leather. Then, you just have some fun and create any design you want! I did this by attaching my strings across from each other and tying off this other end. I continued this process tweaking it some until I was happy with the design.
See, I just kept adding more and more until I thought the design looked full and pretty. On these strands, you can add delicate beads to make it look even cooler than it already does.
And eventually, you reach the final project like this!
If you have seen some of the dream catchers with the piece of lace in the center, this can be made the same way, except, when you get to decorating the center, just thread your small thread through holes in the lace and tie around the slits in the wrapped leather. If you use this approach, it will look like this other dream catcher I made from things I found while I traveled abroad this past semester.
Hope you enjoy and that it is understandable! If you have any questions, just comment. Luh yuh - H


No comments:
Post a Comment